
Chess Set
BUSTED NUTS & BROKEN COLLARBONES
For the first time in many, many months we had friends stay over for the Canada Day weekend (July 1st – 4th) and after a sumptuous dinner and a few cold bevvies some lively games of nine-man-morris and chess were had outside on our patio. Today is Monday the fifth, and I’ve just spent the best part of the morning bagging and recycling the debris of this very enjoyable long weekend and whilst packing away the chessmen I discovered – to my horror – that the darkside queen has a busted nut! A large chunk had somehow (and quite mysteriously) broken away from the crown! (PIC 1, below)
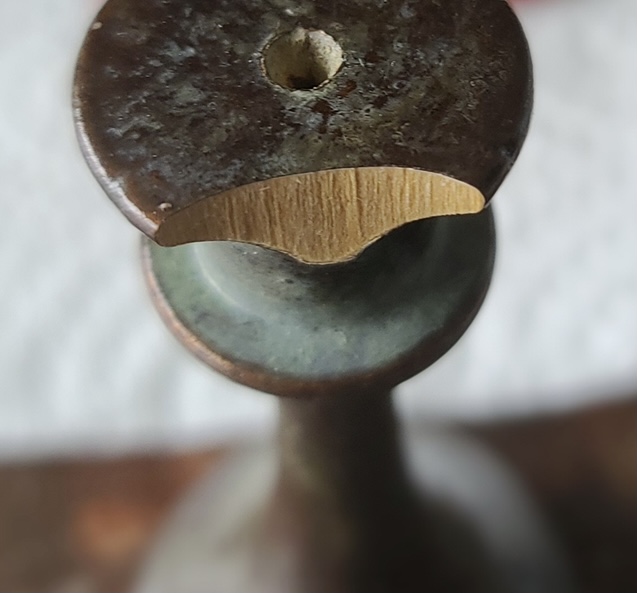
The damage didn’t occur during play – this is something one would definitely remember! – so I’m guessing it may have fallen from the board onto our tiled concrete floor at some point and was innocently picked up again without (the culprit!!) realizing the piece had been damaged. Anyway, shift happens, as I’ve said somewhere before. As you can see, the break is fresh and clean. So clean in fact that if I had the chipped fragment I could probably just insert a support peg or two and glue the piece back into place.
Unfortunately, that’s not going to happen, as I’ve just spent the good part of two hours sifting through the aforementioned debris I’d bagged in search of this elusive tiny fragment and sadly it’s nowhere to be found. Looking on the bright side of this mini-catastrophe, however, we have a splendid topic for July’s Chessay.
Many of us collector’s own chess sets with one or two chipped pieces – the inevitable battle-scars of ‘working’ chessmen. In some of the older sets these chips (to my eye, at least) actually add character, and in many of my ‘distressed’ or ‘aged’ sets I’ve intentionally added a few eyeball-friendly wounds here and there for this very reason. The wound we are dealing with here, however, is not so pleasing to the eye. Even if the break was aged to look like it was made a few decades ago it would still remain damned unsightly. So what to do?
Well, there are a few options, but the one I’ve chosen is probably the most useful to the reader as the same basic restoration method can be applied to similar commonly seen breaks, such as to collars and bases, for instance, and with a certain degree of artistry, this line of Minwax wood finishing products I’m recommending can also be used to make completely invisible repairs should you have the time and patience to do so. In fact, at a later date, I’ll broach the subject of repairing vintage wood patinas for lighter vintage pieces following the same procedure, but that’s another Chessay altogether…
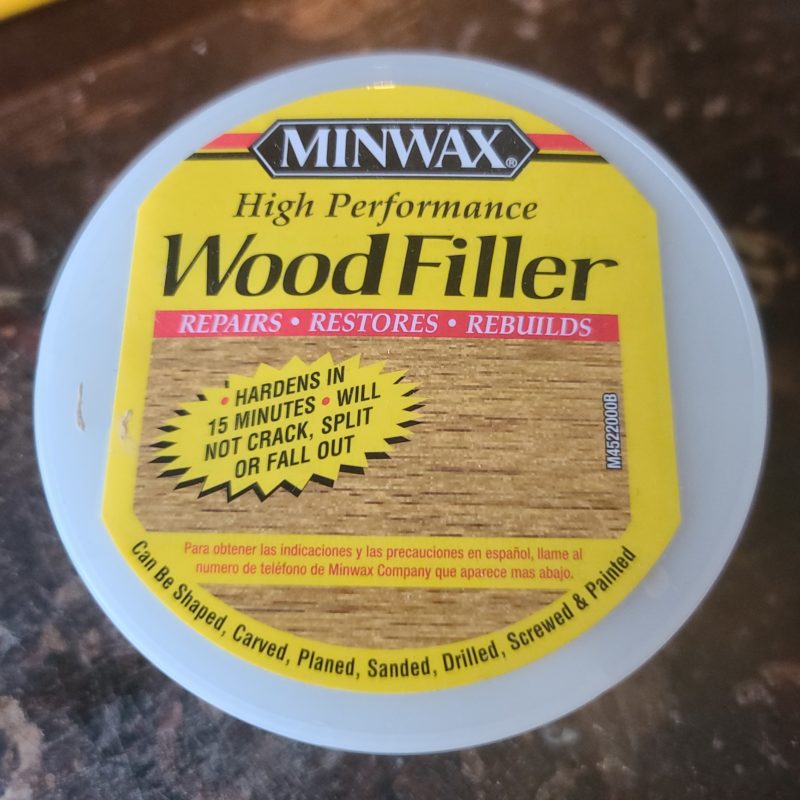
For now, let’s commence with the project at hand; I am going to use a heavy-duty, two-part Minwax wood-filler that is readily available online and in most decent woodworking or D.I.Y. stores. There is very little open time with this filler, so only mix a small amount, apply, let it dry thoroughly, then reapply where and if needed. If you are using a similar product, just make sure it’s as versatile as this one boasts of on the label (PIC 2, below) and you’ll be cruising.
This Minwax product is super-strong, but we are still going to require a small wooden support peg and I’ll also be inserting a thin wire support around the rim for added strength, this is optional, some may say overkill, but it’s a technique (I cockily call it the ‘Power Bar’) that I also use for collars and bases too, so I thought it useful to include here. The same basic idea (on a much larger scale) is used in the construction of condominium towers to strengthen poured concrete floors and columns where steel rods called ‘rebar’ (slang for ‘reinforcing bars’) are used, and living as I do in Toronto – “the condo capital of North America” – you can easily imagine where the idea came from.
I’ll mention here that this my own restoration technique based on thirty or so years of experience working on much larger faux-finishing and historical restoration projects here in North America and back home in the U.K., dealing mostly with antique wooden frames, furniture, cabinetry and even vintage billiard and snooker tables – that are certainly prone to the occasional ‘angry’ nick or two! In most cases there are no manuals for these delicate and specialized ‘invisible’ repairs – you have to fly by the seat of your pants; find or invent the best solution, experiment, research and listen carefully to those experienced craftsmen who are kind enough to impart certain ‘tricks of the trade.’
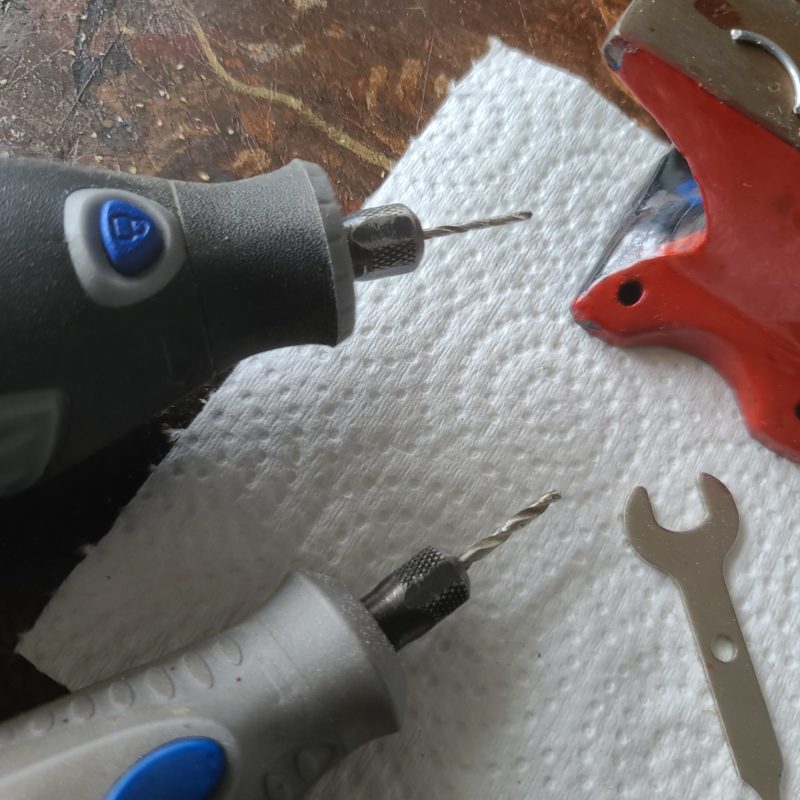
These days, woodworkers are much more fortunate with the plethora of multi-tasking gadgets and restoration aids we have at hand. One of which, a Dremel, is pretty much essential here. If you feel inspired to attempt this (or any of my other Chessay projects) I’d strongly recommend investing in one. They are sooooo more precise and save sooooo much time – you can thank me later! Here we will be using the Dremel 3000 with a 0.5mm and 1mm drill bit (PIC 3, left).
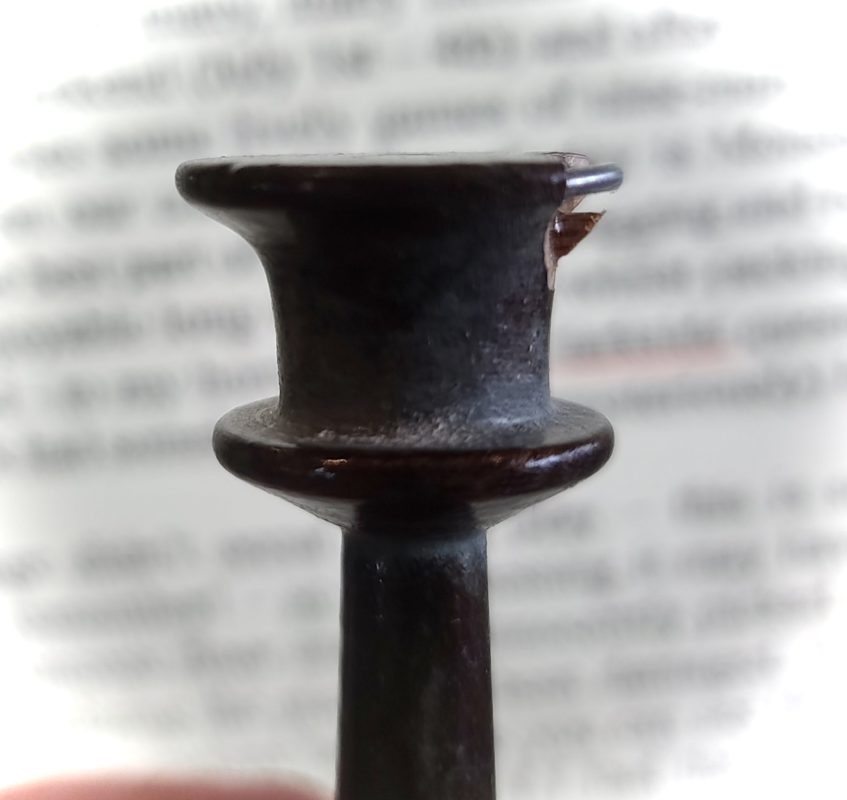
STAGE 1: THE SUPPORT SYSTEM First off, I’m going to eyeball and mark three entry points to the crown (PIC 4, below left). The middle one is for the wooden peg, the two to each side (fractionally higher) are for the 1mm thick wire support. This I will shape with pliers to loosely mimic the exterior curve of the crown using the opposite side as a reference (PIC 5, below right). As you can see, the holes for the wire are drilled at a slight angle following the perimeter of the crown. I score the entry points with a small, sharp tool to guide in the bit, then use the 0.5 drill bit at 2000 r.p.m. (the slowest speed possible) for the initial incision and then enlarge the hole with the 1mm bit, in both cases taking my time, chillin’, taking it easy, to ensure there’s no splintering as we are quite close to the edge.


Once both holes are drilled add a few drops of Gorilla superglue and wiggle the wire ‘power-bar’ into place and it should look something like PIC 6 (below, left). I left this to dry overnight before using the same method to drill the 1mm hole aiming towards the centre for the wooden peg – I prefer bamboo pegs (also used as an alternative to rebar in the construction industry) due to their strength and availability in various widths (just google ‘bamboo knitting needles,’ these come in various thicknesses from 0.5mm to 1.5cm and cut them to size using the cutting wheel of your new Dremel, not pliers, as the bamboo is prone to splinter when crushed. Again, apply a drop of Gorilla superglue into the 1mm hole and insert the peg (PIC 7, below right).


When fully dry this can be trimmed and sanded (using the Dremel cutting wheel and a sanding disc) as we only need the peg protruding a few mm’s from the neck and hopefully, you’ll have something resembling (PIC 8, below) and now we are ready for the Minwax wood-filler.
NOTE: If a similar break had happened to the collar of this queen (or for that matter the base) rather than the crown, the same ‘power-bar’ support technique (a combination of wire and peg) could be used to repair the collar. Obviously, the thinner the collar, the thinner the wire – various sizes of which can be found at any decent hardware or gardening centres – I’m just spewing little tips everywhere today!
STAGE 2: RECONSTRUCTION Another quick and easy prep-step I like to do is scuffing the steel wire. This ‘deforms’ the surface and aids adhesion in the same manner that the ‘ribs’ and ‘indentations’ in rebar promotes a better bond to concrete. You can do this by gently bouncing the Dremel cutting wheel across the surface of the wire (PICs 9&10 below), again, not absolutely necessary, but why not indeed!?


The next stage is fairly straightforward. Mask off the area with green painter’s tape around the break leaving a few mm’s showing around the edge of the repair. I try to avoid straight edges and use the ‘ripped’ part of the tape to do this so as the edges are more organic. As mentioned, there’s little dry-time with this product so mix only what you need. You can see the ratio of hardener (white) to filler (beige) that I used in PIC 11, below left. Also, use something disposable to mix with. The handy wooden beverage stirrers (pictured) are ideal and are ‘freely available’ at your favourite coffee house! Mix the two parts well, then scoop up a small amount and make sure the gaps around the power-bar and peg are completely filled. Now grab the remaining wood-filler and quickly dollop it in place, making sure you have enough excess to sand back. And that’s that! I leave this to dry overnight (again, why not indeed?) resting horizontally with the filler facing down – just let gravity do its thing – and once the tape has been peeled you should have something that resembles a glob of bubble-gum – like those found under school desks (PIC 12, below right).


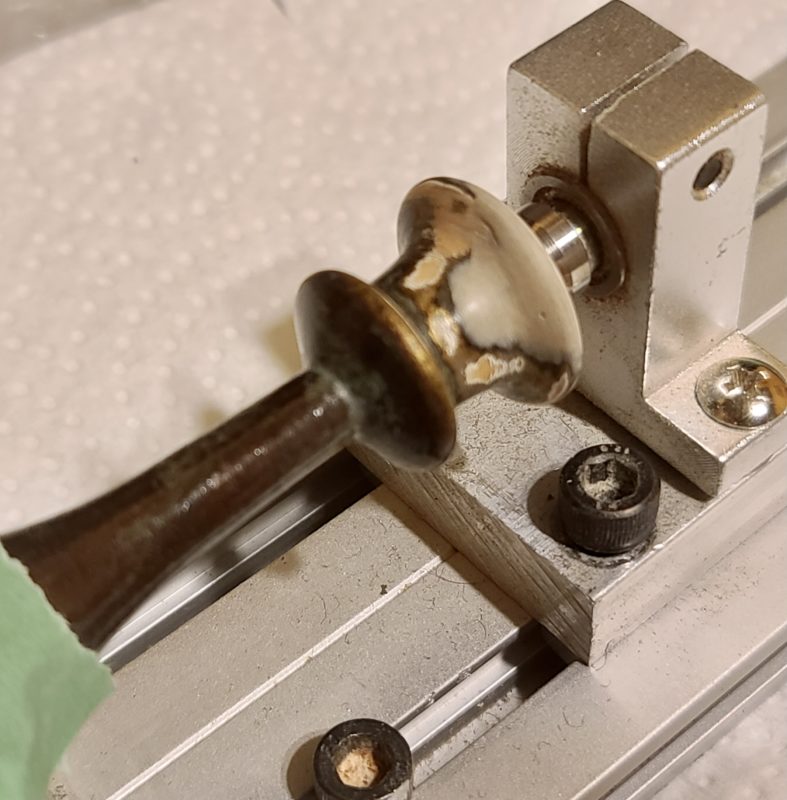
All that remains to be done now is to patiently sand down the repair to the desired form. This I start off by hand with 150 grit sandpaper and then (because I happen to have one handy) I pop queenie onto the mini-lathe for a quick spin with 220 > 400 grit paper, but with a little elbow grease and a good eye, this can quite easily be finished entirely by hand, resulting, at the end of the day, in something that resembles PIC 13, right.
Obviously, for the final stages of this particular project – matching the finish – I’m in the fortunate position of being up a tempo or three as I can simply refer to my records (or my ‘cookbook’ as I call it) to see exactly how this aged, bronze patina was achieved. Before I apply the bronze base coat though some finishing details are required, as this particular Soviet pattern (a 1950’s Mordovian or “Queen’s Gambit” style set) has six barely visible ‘nicks’ evenly spaced around the perimeter hinting at a crown. Two of these have been lost during restoration, so I’ll simply re-cut these nicks using the Dremel cutting wheel on the slowest speed, then gently sand them back to match the others and BOOM! Our work here is done!
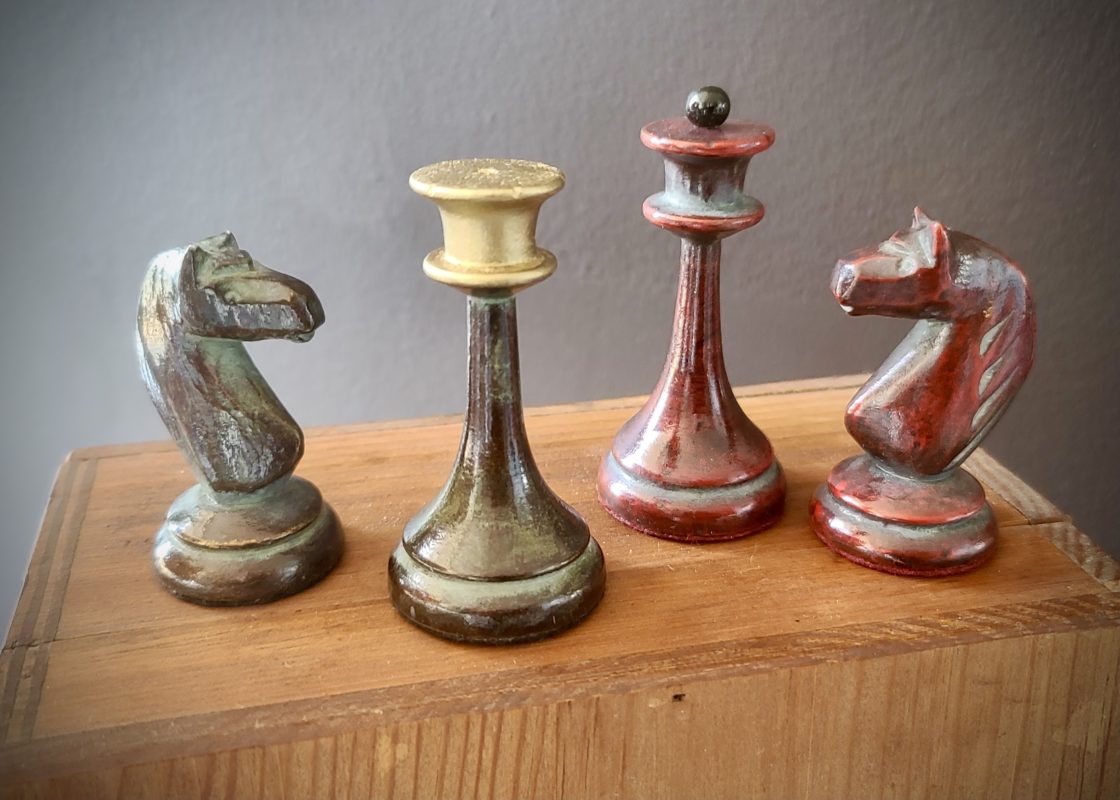
For dessert, I was aiming to show here a ‘revolving’ 360 video clip of the finished crown, but this proved too complicated to insert into the Chessay. Instead, I’ll post the image on our Facebook page The Chess Schach and also on Instagram @thechessschach, too, for you to cast your eye over. In parting, I’ll leave you with a teaser of the family reunited (PIC 15, below) after Her Majesty’s brief spell in intensive care. Once I’ve refinished the crown to match the dark pieces this colourfully reinvented classic Mordovian-Latvian set should be up in our galleries in a few days time – should you perchance fancy a few games with these unique pieces yourself?
For now, thanks for swinging by. I’ll Check you Later!
All rights reserved: Alan W. Power (The Chess Schach), July/2021