
Chess Set
SHIFT HAPPENS
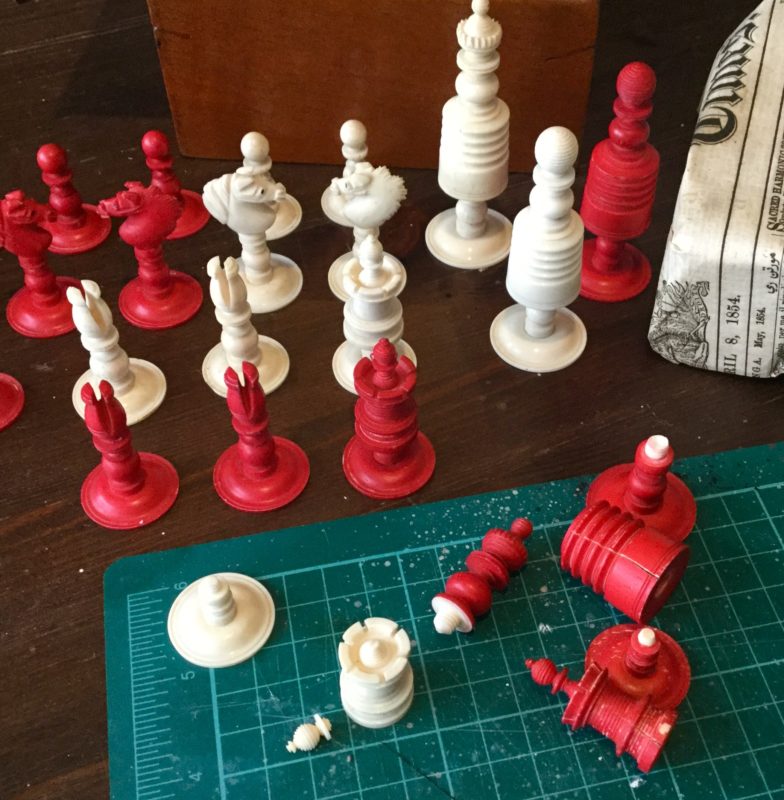
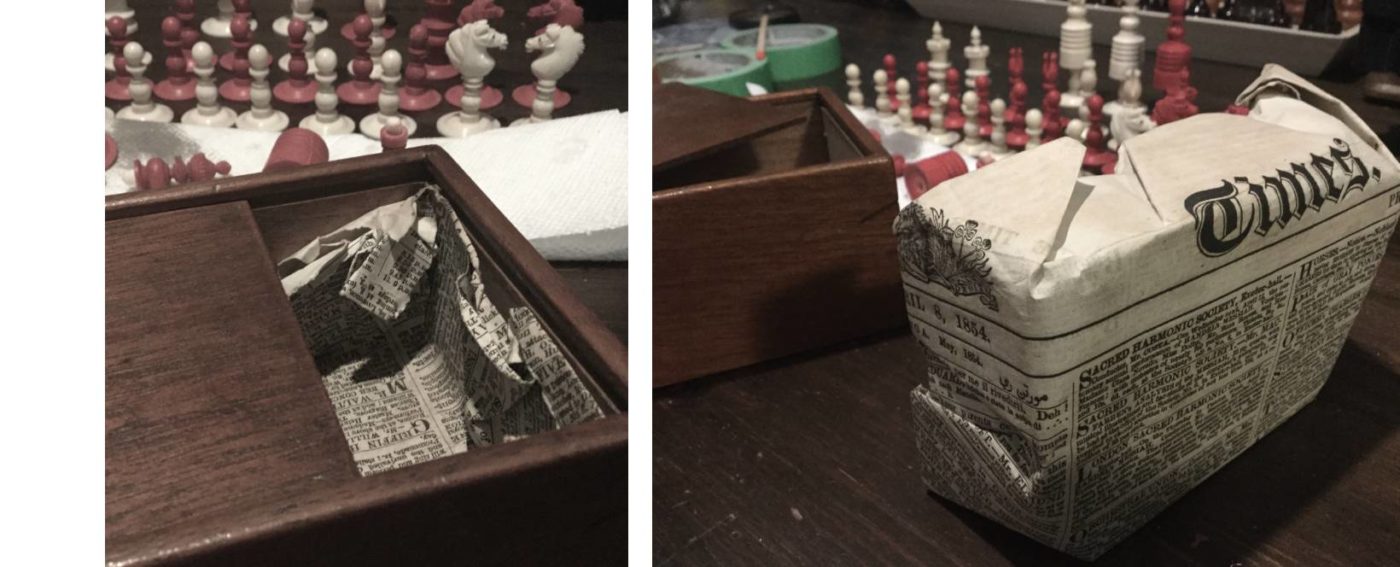
Yesterday, for want of a change, I decided to take a break from the wood and restore a beautiful old English chess set handmade from bone that’s been waiting patiently in the wings for well over a year now. As you can see from Pic 1, overall the pieces are in excellent condition considering their age, which we can pinpoint with some accuracy due to the paper lining found in the “original box” they arrived in. And to my joyful amazement, the lining in question was nothing other than an old page from The Times of London (see Pics 2 & 3) “price 5d” and dated Saturday April 8th, 1854! Unfathomably, there was no mention of this informative lining paper – not to mention that it would be a stellar selling-point – by the English dealer of antiquities (mainly coins, books, maps, etc.) who has since informed me that he hadn’t properly examined the lining paper otherwise he wouldn’t have advertised the set as “c.1870” and would most certainly have added “a few more f*%*ing quid” to the asking price! Much like the “matching pieces in their original box” the paper looks, feels and smells quite authentic, which I honestly believe to be the case. So although the box has no label or any other distinctive markings (like many similarly constructed Jaques of London boxes) we can say with some certainty that these are early Victorian bone chessmen dating from the opening decades of Queen Victoria’s reign which began, as we all know, in 1837, and in all probability were hand-carved and turned in my old stomping ground, London, which makes them just that little bit extra-special to work on!
There was no mention of ‘fractures’ or ‘decapitations’ by the dealer, so I assume the damage you see in the photographs either happened in transit (or like the lining paper) somehow escaped a diligent examination – in any case, it is what it is – shift happens, as they say. Damage of this nature, the cracks especially, need to be addressed before they get any worse (particularly if like me you are planning to use them!), indeed, the barrel of the red rook (Pic 4) is in grave danger of splitting completely in half. Which, ironically, is the simplest of all the repairs as it can be carefully glued together (using Gorilla glue in this case) and parked up in a mini-clamp for a few days. Problem solved (see Pic 5)! The decapitation of the white rook, mind you, is a different beast altogether and probably the most visually informative, so let me take you through the methods I used to place the old boy’s head back onto his corpse.


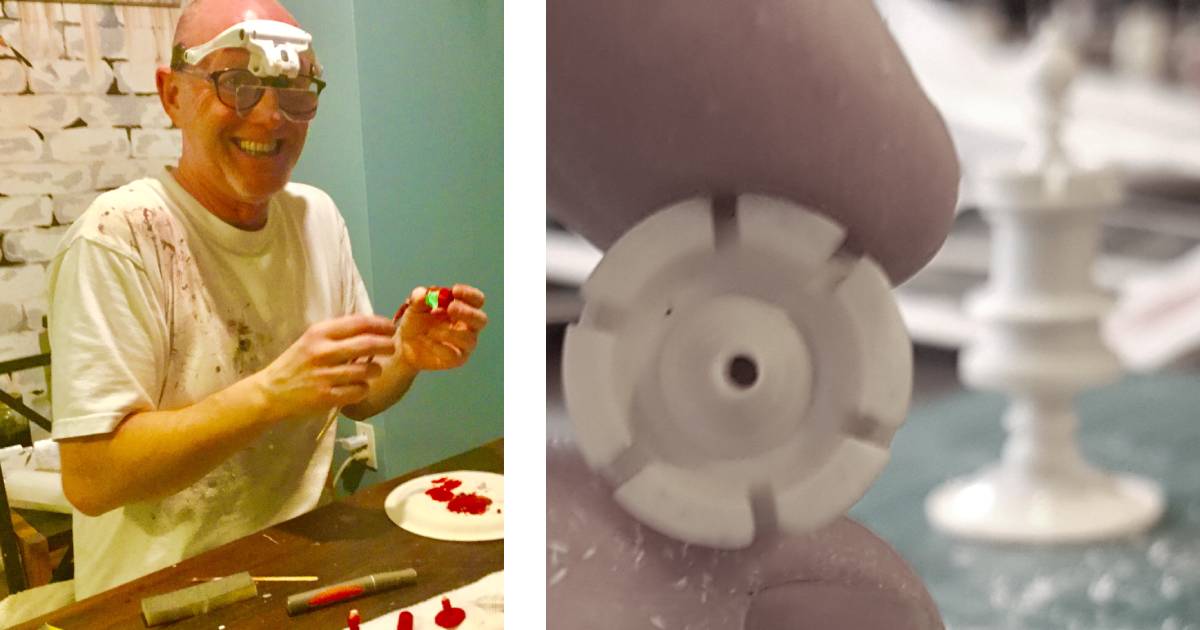
This ‘head,’ by the way, is just 10mm tall and 5mm wide – a bit like drilling into the core of a dried peppercorn! But to ensure a solid fix (one that will hopefully outlive me at least!) we need to insert a peg or plug of some description 2 or 3mm into this tiny finial and as deep as we dare through the conical turret of the barrel. A task not made any easier by the size of the points of entry – in both cases, just 3mm wide (Pic 6, left). Needless to say, the next move required some thought…
Before we start to bore into our crenellated patient, however, we need to ensure both surfaces are absolutely level as we are looking for a ‘clean fix,’ meaning I don’t want to use any filler at all, if possible, so there cannot be any space whatsoever between the finial and main body. The two pieces should fit seamlessly together…and this is easier said than done. After the aforementioned pause for thought I began by gently (and very, very slowly) sanding down our entry points on both pieces until I could comfortably balance the finial on top of the main body – I have always excelled at balancing tricks! Thus satisfied, the next step was to score an accurate entry marker for our 1mm drill bit using the sharpest, smallest tool at hand. I generally do this by eye, but here we have little choice – I wear my ‘super-goggles’ for this task, on the highest magnification (see Pic 7) and take my time, making sure the bit will hit the bulls-eye dead centre (Pic 8) – we have no room for error here as a 1mm bit will only leave a millimetre each side of it, a slip either way could be fatal to the patient!
For pieces this small I prefer to trust my hand-eye coordination rather than a clunky drill press, but use whatever you’re comfortable with. Here, I used a light cordless Dremel with the 1mm bit at 5,000 rpm to begin with, then once confident of a sure line increased the speed up to 25,000 rpm and hammered her home. I work mostly with wood and hard resins, so it’d be a lie to say my nerves weren’t all of a jangle at this point, but in the end I just got myself comfortable (crouching down to eye-level with the rook and as close as I dare – again, with my ‘super-bins’ on) and just trusted my hands and eyes to do the work. It was over in seconds (like the games I’ve played against GM’s!) and thankfully, as you can see in Pics 9 & 10 the surgery was successful (albeit very stressful) and after another very light sand (using 600 grit paper) we are ready to insert our plug, which shall be glued firmly into place.

Some restorers use a bone peg here, and each to their own, but I prefer to sac pieces – whatever wins the battle! So I made use of the drill bit that bore the hole, after all, it’s a perfect fit! (see Pic 11) I measure up precisely and make a quick cut with the rotary tool leaving a mill or two spare (better safe than sorry, as that useful old adage goes). The excess can then be gradually ground down with a small grinding wheel until the cap sits perfectly level on top. Easy peasy? Whew, I think not!
So, we are nearly there! Now the Gorilla comes in handy once again, but I hate messy joints and overspill, once it dries up it’s a royal pain in the arse to remove, especially from a delicate surface such as bone, so here’s a little tip that as a chess player you should enjoy.
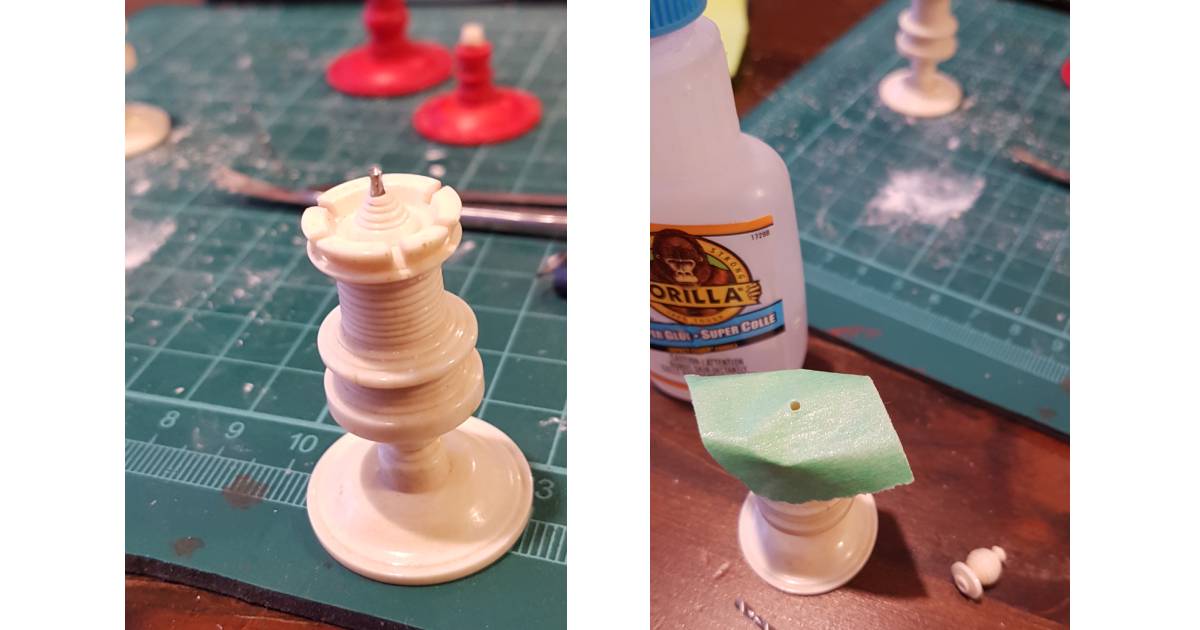
Don’t trust to luck in placing that glue in the hole. Take a few minutes and simply place a piece of tape over the entry point, pierce with something sharp and remove any tape from inside the hole (see Pic 12) – you don’t want to be picking out minute strands of tape later either.

As soon as you’ve placed the appropriate amount of glue in the hole (and don’t go ape with the Gorilla), whip the tape off sharpish and quickly insert the cut-to-size steel support rod. Repeat this trick with the finial, and, dear listener, we – are – done (see Pic 13).
Or at least you are done. I still have the King to tend too, which, if interested, you can follow @thechessschach over on Instagram or check out our Facebook page over January for updates. Please bear in mind that many of the above techniques can be applied to wood too… be adventurous, just saying! Till next time – Check you later!
Oh! Before I go, here’s that fragile inner lining page from The Times (Pic 14), just in case you were curious, Holger and Chuck! 😉 I’ve unfurled it twice now. This time I documented it (how smart am I!), so it will be once more returned to where it has lain for the last 166 years never to be disturbed again – by my hand anyhow…
All rights reserved by Alan W. Power (The Chess Schach), Jan/2020
